We believe our solid oak kitchen is stunning but if you want a completely custom look to your kitchen, why not choose to paint your kitchen cabinets? Painting kitchen cabinets gives you the freedom of choosing your look with the knowledge that the cabinets are highest quality Besp-Oak solid oak.
Get creative- you could us a darker colour on the base units and a lighter coordinating colour on the wall units for an on trend look. Leaving drawers or shelves unpainted on your larder can add another level of interest.

What Paint Should you Use For Kitchen Cabinets?
Which finish is best when painting kitchen cabinets- matte , satin or gloss? Your quality Besp-Oak Kitchen has a 10-year guarantee, so you want to choose a hard-wearing finish that will last as long as our high-quality cabinets. For this reason, matte paint is not ideal. We would suggest semi-gloss, gloss or satin, and try to use the highest quality your budget can afford. A high gloss finish is very hard wearing, but can be less forgiving during the painting process. A satin finish can be more forgiving, hiding brush strokes yet being washable to withstand the wear and tear of a family kitchen.
Below is our step by step guide to painting kitchen cabinets- whichever style you choose!
Preparation
The foundation of a perfectly painted finish is to clean with soap spray- any grease or grime on your cabinets will lead to the paint finish being uneven, or not lasting as long.
Label all your cabinets, doors and drawers so you know where to put them back. You could use a hand drawn plan and masking tape labels on each item. Remove the doors drawers’ hinges and knobs, and store them in sandwich bags labelled clearly.
Create a suitable work area for you to do your painting, making sure it is clean and dry. Use painters’ tripods to rest your doors and drawers on while painting kitchen cabinets so you can easily reach the edges for a smooth finish.
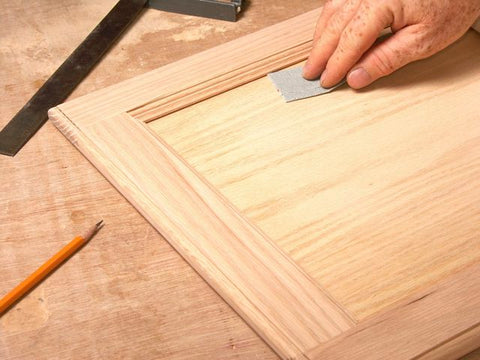
Lightly sand the surfaces using 150 or 200 grit sandpaper, giving the surfaces a quick buff to take the surface from gloss to matt to help the paint adhere. Next, make sure to clean all dust and debris away using a vacuum with the brush attachment and a tack cloth- take time here to make sure it is all removed as any debris will spoil your finish.
Prime
Use a knot and resin blocking primer to ensure any natural pattern in the wood will not bleed through and ruin your paint finish. Work from inside out, back to front. Use a mini roller for large flat areas. When you’ve covered the surface, take your dry roller or brush (don’t reload it) and lightly go over the surface once again to remove any build-up. This is called “laying off.”
Next prime the doors and drawers. Paint the back first, then turn over on tripods to paint the front. Start with the most detailed areas making sure the paint does not pool in corners, and then use your paint roller on larger areas.
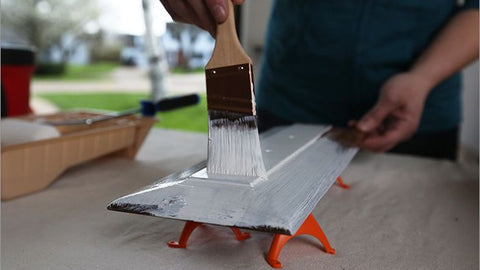
 Using a roller on larger areas for speed
For drawers just paint the front if possible, as painting the side and bottom can cause the drawers to stick.
Allow primer to dry for a few hours. Depending on the primer you use it may suggest to sand with a light sandpaper once dry. If this is required then make sure to vacuum and use tack cloth again to remove all dust- this will keep your paint finish completely smooth and free of impurities. Then it’s time to paint!
Painting Kitchen Cabinets
When painting kitchen cabinets, simply use the same technique with the paint as you used to apply the primer. Starting with the inside and back, working to the front. Refer to the paint you have chosen for a guide to paint drying times, as they may vary between brands. Remember to use the “laying off” technique again to create a perfectly smooth finish.
Apply a second coat of paint once the first is fully dry.
One of the most important steps is to make sure you are leaving enough time for the cabinets to fully dry, because rushing here might mean having to redo a whole section so try to be patient!
Hardware
Once everything is dry you can use your labels to reattach doors and drawers.
Use the hinges and knobs supplied with your kitchen units, or you could even choose a whole new look. Our Besp-Oak Kitchen Cabinets come with door knobs supplied but the cabinets are not drilled. This ensures you can choose what height you would prefer to mount them, or you can even buy a completely different style to suit your taste.
With a little preparation and some patience, you can have completely unique customized kitchen cabinets with a perfectly professional finish!
For any further guidance, see the below links-
Good Housekeeping- Mistakes to Avoid
Call or email us for help-
Phone: 02476978866
Email: Info@besp-oakkitchens.co.uk